Java application as Linux Service in 4 steps

If you are reading this post then, probably, you need to execute your java app as a Linux service.

This can be done in 4 really easy steps

  • Create the service
  • create a bash script
  • give execution permission to the bash file
  • enable and start your brand new service

Step 1: create the system service

sudo nano /etc/systemd/system/MyFantasticJavaApp.service

it will open the nano editor. Add the following, changing the working directory and the User values based on your convenience

                                                                                                 
 [Unit]
 Description=good old Java application
 [Service]
 User=root  
 # The configuration file application.properties should be here:
 # change this with your workspace
 WorkingDirectory=/usr/local/javaproject/

 #path to executable.
 #executable is a bash script which calls jar file
 ExecStart=/usr/local/javaproject/myBashFile
 SuccessExitStatus=143
 TimeoutStopSec=10
 Restart=on-failure
 RestartSec=5
 [Install]
 WantedBy=multi-user.target

save the file (Ctrl-X, select Y(es) and press enter)

Step 2: create the bash script

Now let’s create a script which will basically call our jar/war file.

This file has to be the one specified in previous service file (what we call in ExecStart value). So, let’s write:

sudo nano /usr/local/javaproject/myBashFile

it will open (again) the nano editor. Add the following 2(two) lines, changing the port and the path to your jar/war file

#!/bin/sh
 sudo /usr/bin/java -Dserver.port=7080  -jar /usr/local/javaproject/MyFantasticJavaApp.jar

save the file (Ctrl-X, select Y(es) and press enter)

Step 3: give execution permission to the basch script

this is the simpler step. Just write this, changing the file and his path:

sudo chmod u+x /usr/local/javaproject/myBashFile

Step 4, almost there: let’s play the new service

sudo systemctl daemon-reload
sudo systemctl enable MyFantasticJavaApp.service
sudo systemctl start MyFantasticJavaApp

Et voila! Do not thank me!

toString() to JSON with Eclipse

right click –> Source –> generate toString() –> Generated code fieldset –> Edit button –> New.. button –> give a name (ex. JSON) –> copy and paste this pattern:

{"${member.name()}":"${member.value}", "${otherMembers}"}

That’s it.

Hope this help!

Exceptions in the life: Checked vs Unchecked problems

In Java, as well as in your life, there two type of exception:

  1. checked exception that are the expected problems
  2. unchecked exception, that are the unexpected problems.

As in the life, for the expected events you are prepared because you plain to have that problem. So you are organized to intercept and block that problem. For example, if you are a student, or you have been a student, you know that your teacher could exam you. To avoid a negative
vote, or problem with you parents , you (theoretically) study. If you don’t study enough you could have a bad vote. But basically you are aware.

In Java is exactly the same, apart from the fact that problems are named Exception. You, and also the compiler, know that you can expect an exception calling a method and then you prevent that exception intercepting it with a try-catch-finally block.

int vote;
try{
vote=teacher.exams(you);
}
catch(NoStudiedException nse){
vote=VOTE.Very_Bad;
}
finally{
register.setVote(you,vote);
}

In Java you are aware because exists the throws clause that forces you to face up to your problem.

The exams method of Teacher class is like below:

public int exams(Student student) throws NoStudiedException{

}

But, unfortunately, there are no just checked exception. We can have also unexpected exception that you and the compiler are not aware, for example RuntimeException, ArrayIndexOutOfBoundException, but above all: NullPointerException.

They are all problems you could never have imagined it could happen to you. They are Unchecked.

All exception under Error and RuntimeException classes are Unchecked

You have to know the difference even because there are some framework that have different behavior based on checked and unchecked events.

For example JPA, that is in charge of transactions, makes an automatic rollback just in case of unchecked exception, BUT doesn’t make the same for the checked ones. It means that, if you use JPA and you want rollback when a CheckedException happens, then you have manually rollback out, adding the clause “rollbackFor=<CheckedException>.class” above the method. If you don’t use JPA and his children/nephew then pretend I did not say anything…

Weblogic Domain and Cluster


What is a domain?

A domain, in weblogic world, is a set of weblogic (WL) instances that can be managed by the same administration console.
That’s why they are call managed servers.
Each WL instance can run on the same machine of the administration server or remotely

What is a weblogic instance?

It is just an ip and port address where the single weblogic listen

Why to use (or at least to be aware)

If you have different weblogic servers that you need to manage (remotely for example) you can create a domain that includes them.
Or/And, if you need a cluster of instances then you must before add all cluster instances in a domain and then you can create your cluster
So you can have two types on WL instances in a domain: Standalone (which don’t belong to any cluster) and Clustered

How

In weblogic console, in Environment==> Servers you can add you weblogic instances. You have just to know the ip and port address of each weblogic instance you want to add in the domain

What is a cluster?

A cluster is a subset of a weblogic domain, where each WL instance of the cluster has the same goal: allow load balancing and fail over for the fantastic (same) applications they host.

Of course, as you manage a set of instance for the same application(s), when you deploy the application you do it just one time for all WL instance in the cluser, and the WebLogic Administration is in charge of update all instances in the cluster.
Just a thing good to know: all the WL in a cluster must have the same WL version

From a client point of view the cluster is transparent. The client doesn’t know how many WL instances there are behind that ip address

Why

Advantages of a cluster are the same of LoadBalancing and Failover.

Scalability (Load Balancing): The capacity of an application deployed on a WebLogic Server cluster can be increased dynamically to meet demand. You can add server instances to a cluster without interruption of service, the application continues to run without impact to clients and end users.


High-Availability (Failover): In a WebLogic Server cluster, application processing can continue when a server instance fails. You “cluster” application components by deploying them on multiple server instances in the cluster so, if a server instance on which a component is running fails, an other server instance on which that component is deployed can continue application processing.

How

You can manage WL instances for a cluster in just two steps:

  1. create the cluster (in Environment ==> clusters ==> new button)
  2. for each existing or new server you can choose a cluster

That’s it!

Debug remotely with Eclipse

To debug with eclipse to remote server follow below instructions

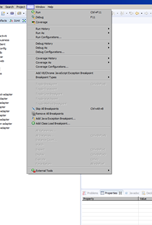
In the menu Run –> Debug configurations…

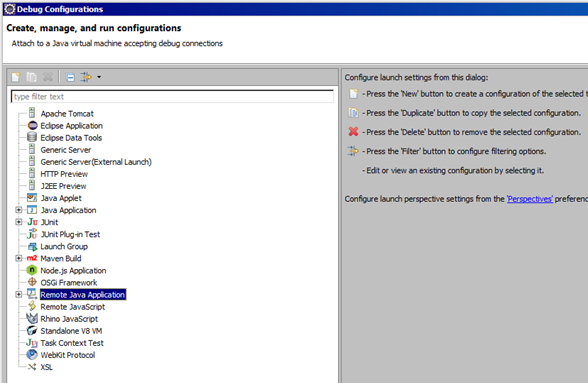
In the window popup select Remote Java Application

Right click, then select New

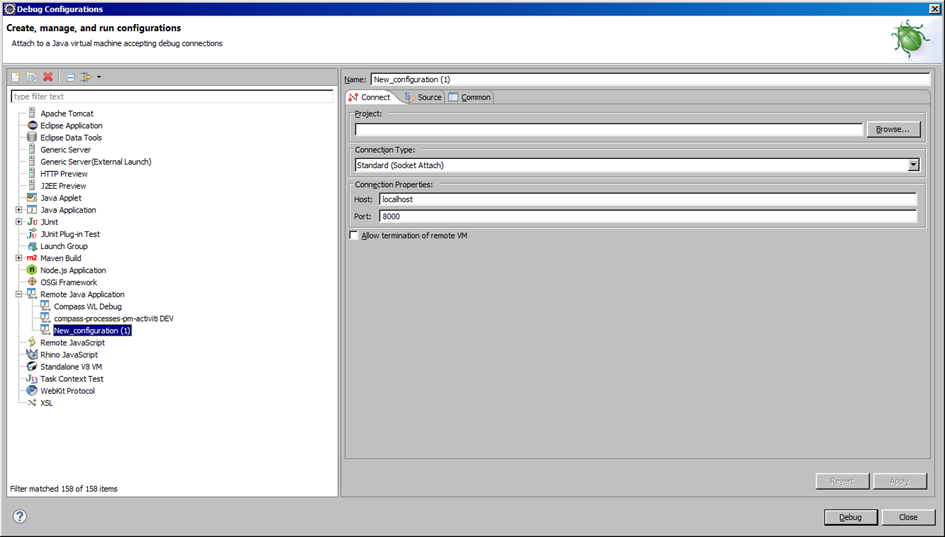
On the right a new fieldset appears

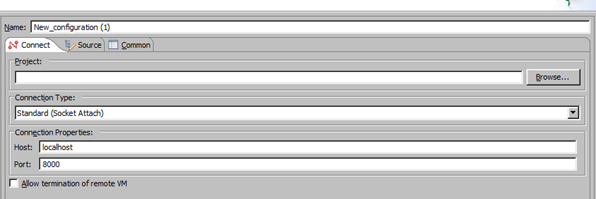
In the Project field browse the java project to attach

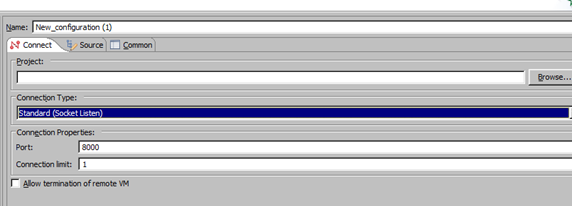
In the Connection Type field:

  • Select “Standard (Socket Attach)” – int the 99% of cases -, if you want to attach your eclipse to a server (which listen on a ip and port). In this case you should specify the IP/name and the port of the server you want to attach
  • Select “Standard (Socket Listen)”, if you want to be the host, listening just on a port (and on your ip). In this case you should just specify the port and the connection number you want to allow. Of course the machine is the same of eclispe running instance

The listening port, in both case (local and remote), must be preconfigured setting, as jvm parameters, the following:

-Xdebug -Xnoagent -Xrunjdwp:transport=dt_socket,address=4000

  • The -XDebug parameter enables debugging
  • The -Xrunjdwp parameter loads the JPDA reference implementation of JDWP
  • Debugging, in the example, is enabled on port 4000

The JDWP protocol is the protocol used to debug with a remote debugger.

For example, in WebLogic server, to allow a debug socket listener, in the file “startWebLogic.cmd” add to the JAVA OPTIONS:

set JAVA_OPTIONS=-<others params> Xdebug -Xnoagent -Xrunjdwp:transport=dt_socket,address=4000,server=y,suspend=n

The -Xnoagent parameter disables the default sun.tools.debug debug agent

Just a little notice: if you want to debug clustered application, you have to attach the debug ide to all clustered servers, otherwise you need to be lucky to get the request to your debugged server

Curiosity: default debug port on weblogic 12.1.3 is 8453

Label in Java

The label in Java (from version 7) is a way of giving a logic name to a loop statement.

Why naming a statement in Java?
Just because in case, of very deeper loops, you want to break/continue that specific statement.

How to give a name to a statement?
Specifying a name (as a class style) followed by “:”

How can you break using label?
Simple, with break and continue followed by the label name. That’s it.

Example

  Task:
  {
    (loop statement){
        if (condition){
            break Task;
        }
    }
  }

In the above example “Task” is the label. When you reach the line “break Task;” the program will go outside the Task statement.
Of course the similar logic works with “continue Task;“, but in this case the program will continue with labeled statement.

A little curiosity, the below code works perfectly:

public int myMethod(){
http://www.google.com
return 1;
}

because “http:” is treated as label and “//www.google.com” is treated as comment